
[ad_1]
Sony’s DualShock 4 is a really good controller that can double as your full-time PC gamepad as well. If you have an aging DS4, you may have noticed that it does not hold a charge as long as it once did. When it gets to that point, many choose to buy a new one. While the DualShock is not the most expensive gamepad on the market, it’s not exactly cheap either at $60 a piece.
Unless your DS4 has other things wrong with it, it doesn’t make much sense to buy a new one when changing the battery is a cheap and easy fix. Recently, I found that both of my controllers were not holding a charge for very long and couldn’t justify the expense of replacing them both.
In this guide, we’ll show you how to save over 70% by replacing your DualShock battery yourself.
What You Will Need
The only tools you will need for this repair are a Phillips #00 screwdriver and a nonabrasive prying tool. You may already have a screwdriver, but if not, you can pick one up for around $3 on Amazon. A nylon spudger will work for prying. The cheapest we found was one from iFixit for about $2.
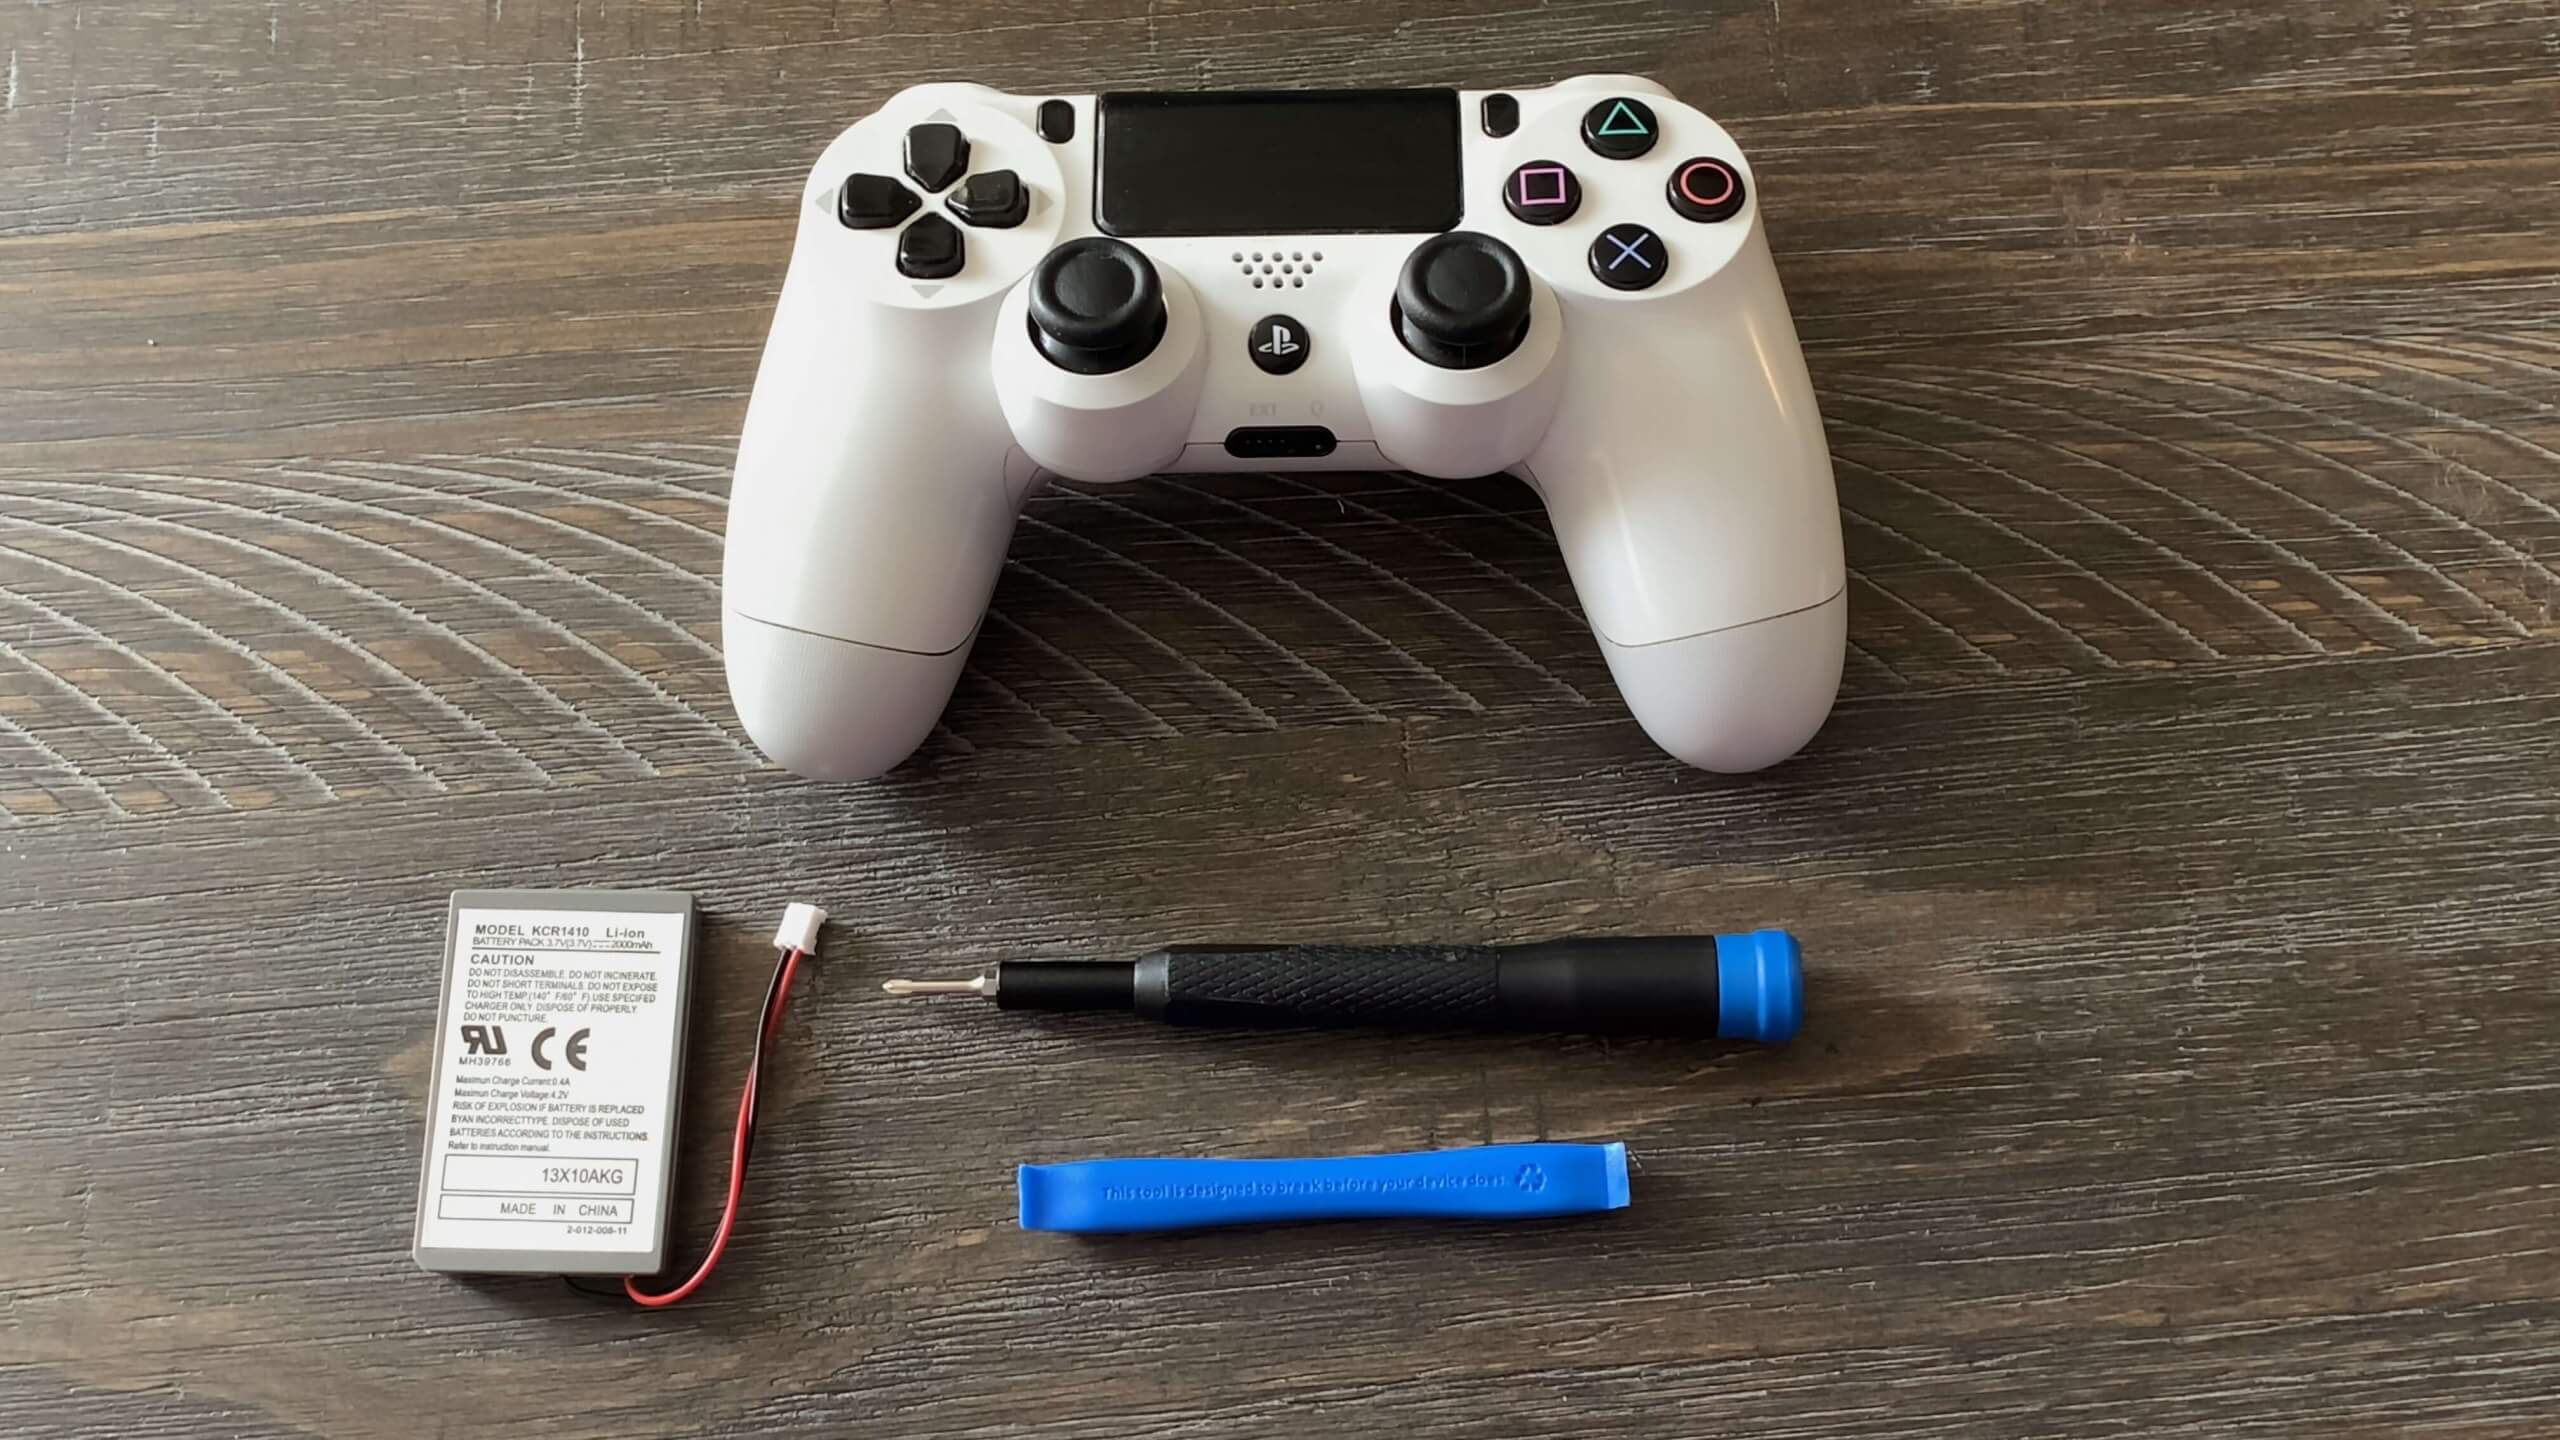
You will also need a 3.7V battery. You will need one of two types, depending on your DualShock4’s model number. While the battery type is the same, the connectors are different, so make sure you get the right one. For controller model number CUH-ZCT1E or CUH-ZCT1U, you need the large connector type. Units listed as CUH-ZCT2 or CUH-ZCT2U have the smaller plug. The model number is printed on the sticker on the back of the controller (see image in Step #1 below).
Generally, you can find generic batteries for around $15. Stock DS4 batteries are 1000mAh. Most of the generics on the market are of higher capacities, which is fine. I happened to score a 2000mAh two-pack on sale for a pair of early model controllers for $13 from The Perfect Part (find the batteries on Amazon or Ebay).
Before Getting Started

We recommend you are working in a controlled workspace. The buttons and springs for the L2 and R2 triggers have a tendancy to fall out, particularly the R2. The springs are small and can be hard to find, so be careful.
When prying the controller apart, you will hear loud snapping sounds. Do not be alarmed. Nothing is breaking, but do take it slow.
On some DualShock 4s, the ribbon cable for the controller’s lightbar has a blue plastic strip on one side. This blue strip goes away from the center of the controller. If it does not have this strip, be sure you pay attention to the orientation of the ribbon before removing it, so you get it back in the same way.
With all the prep work done, replacing your DualShock 4 battery takes five reasonably simple steps (or nine if you include reassembly). So let’s get started.
Step by Step
Step #1: Remove the four screws on the back of the DualShock. They are pretty small, so place them somewhere they are not going to roll away or get lost.

Step #2: With the front of the controller facing you, press in on both sides of the grip right at the seam to give yourself a gap. It takes quite a bit of pressure if the controller has never been taken apart before.
Step #3: Once you have a gap, slip the spudger in and pry up a bit right at the seam’s curve. Use the thumb of your other hand to keep the seam open while you jimmy the spudger up toward the left analog stick. Keep prying and using your thumb to hold the gap as it widens. This process takes a fair amount of pressure. Repeat the process on the right grip.

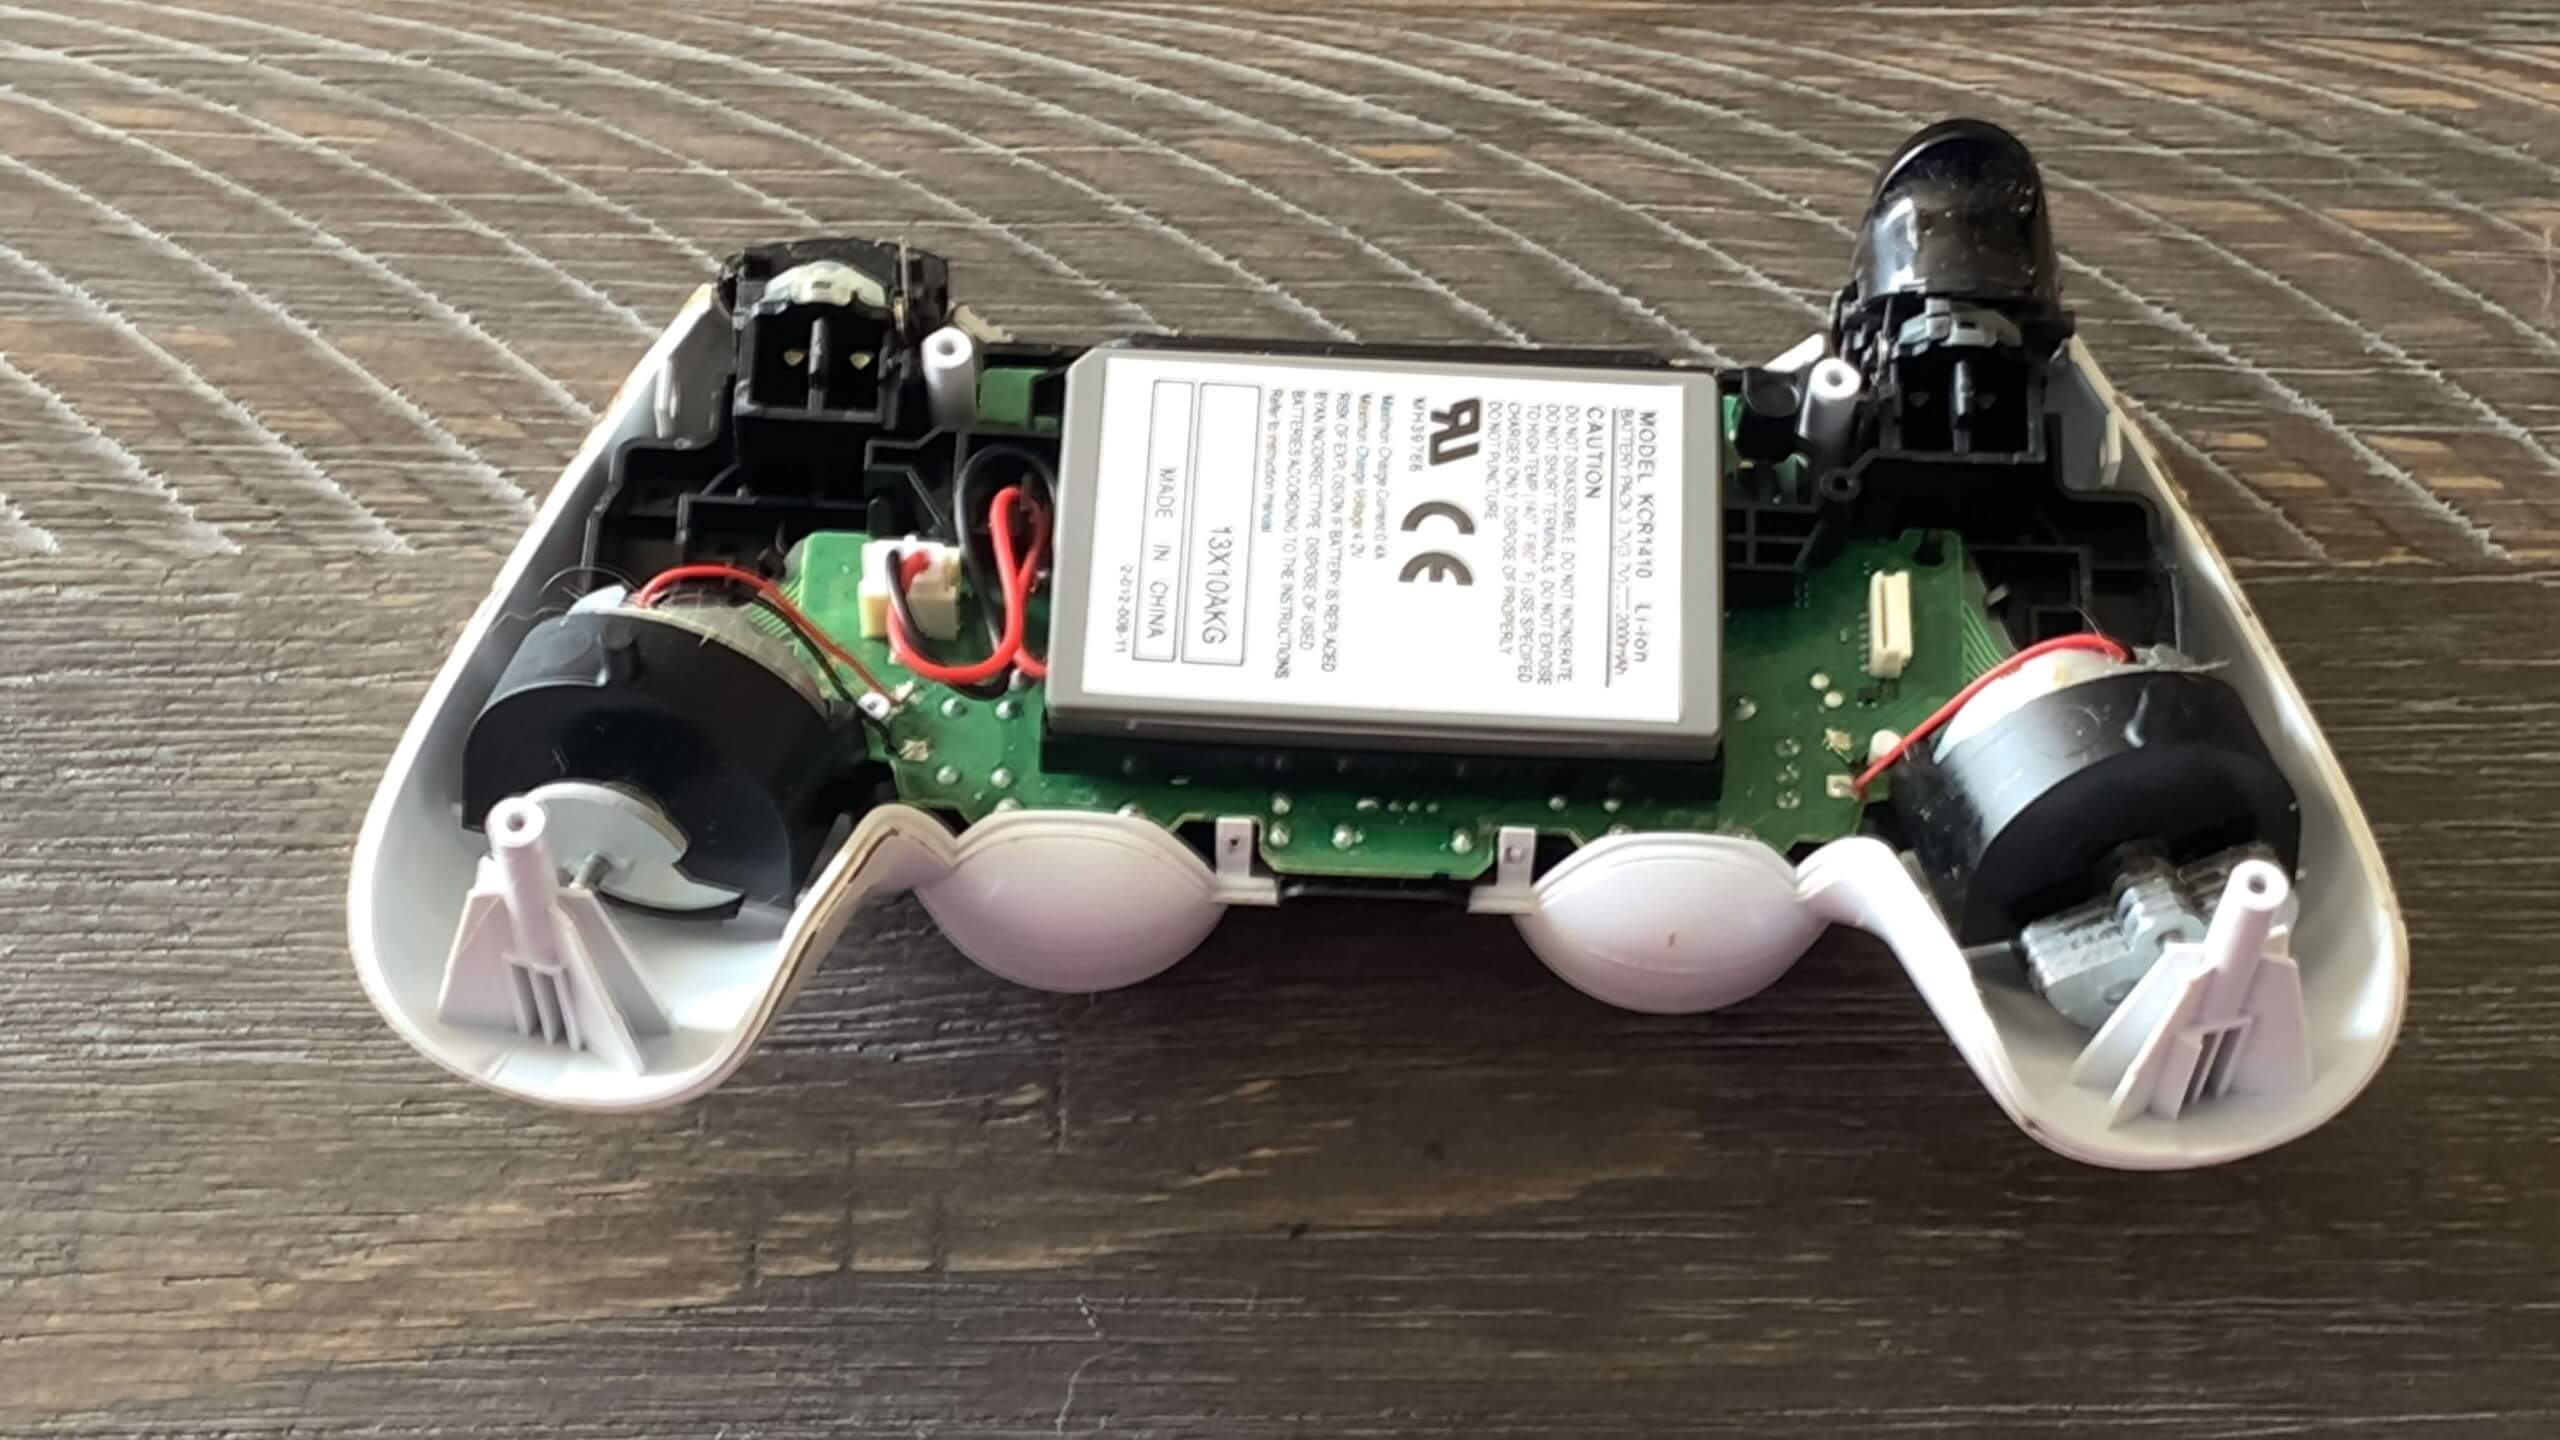
Step #4: Once the top and bottom halves of the DualShock have broken free, you can separate them easily. Be careful as there is a ribbon cable connecting the two halves going from the lightbar to the circuit board. To make things easier, disconnect the ribbon cable by pulling straight up and away from the motherboard. Note the orientation of the connection so you can replace it the same way it came out.

Step #5: Unplug the old battery by gripping the sides of the connector and rocking it back and forth while pulling. They are pretty snug, so it might take a bit of coaxing. Plug the new battery, making sure it fully seats into the socket. Place the battery back into its cradle and then perform steps one through four in reverse order.
Our replacement batteries were shipped fully charged, but that may not always be the case. If it seems the controller is not working, plug it in via the USB charging cable first before taking everything apart again. As long as the lightbar comes on and you can control your console while plugged in, the battery only needs to charge to be able to use it wirelessly.

We already had the tools lying around for this quick repair, so the total to fix two DualShock 4 controllers was a mere $13. Even if you cannot find the batteries on sale and you have to buy the tools as well, the cost of replacing the battery on one controller should not run more than $20.
That’s a pretty good deal over paying retail for a new DS4. It’s an extremely easy fix that only takes about 15 minutes of your time, and the satisfaction of doing it yourself is its own reward. If this DIY put you in the mood for another project while you are cooped up at home, check out our guide on how to upgrade your PlayStation 4’s hard drive.
[ad_2]
Source link