A bootable USB drive lets you load a different operating system without installing it on the hard drive. This is useful when you need to run diagnostics outside the Windows OS environment in case of a no-boot situation, virus infection or system maintenance. Most bootable media are available in image formats that can be quickly written to a CD. Plus, keeping a USB drive is more convenient now and can also be used if a computer lacks an optical drive.
What you need:
- A Windows PC
- A USB pen drive. The capacity will depend on what you plan to create. Some may only require 1GB while other may need an 8GB pen drive.
- Rufus: A lightweight tool that quickly turns a regular USB storage drive into a bootable one. This utility can be downloaded from https://rufus.ie
How to create a bootable USB drive:
3.
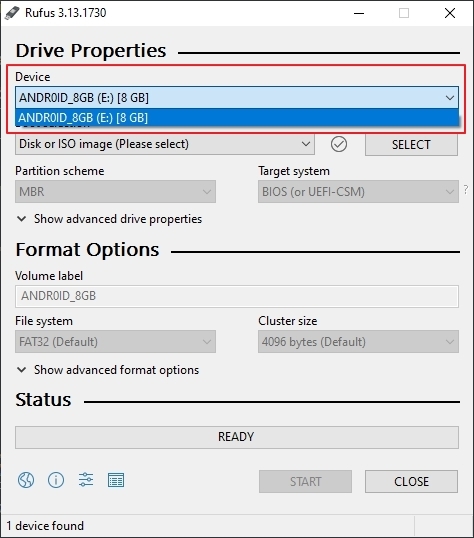
Rufus will list the pen drive in the Device section. If you have multiple portable storage devices connected to the computer, click the drop-down arrow to list the correct one.
Rufus will list the pen drive in the Device section. If you have multiple portable storage devices connected to the computer, click the drop-down arrow to list the correct one.
4.
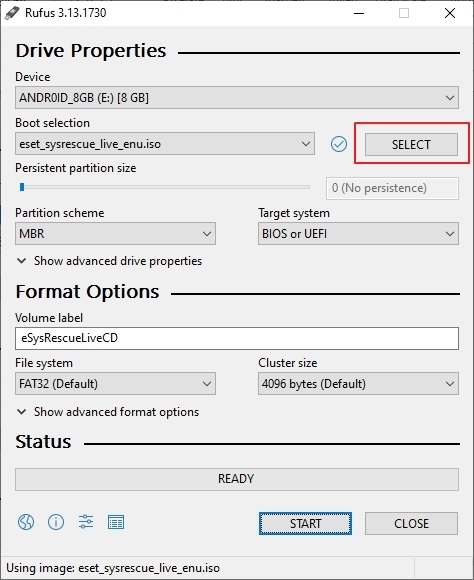
Click the Select button that’s alongside the Boot selection option. Browse to where the ISO file is located. This is the image that will be written to the flash drive, along with files that will allow you to boot the system via USB.
Click the Select button that’s alongside the Boot selection option. Browse to where the ISO file is located. This is the image that will be written to the flash drive, along with files that will allow you to boot the system via USB.
5.
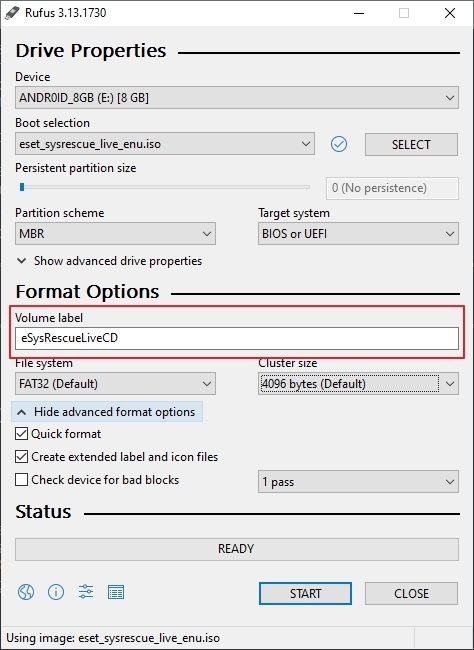
Under Format Options, enter a ‘volume label’. In this case, it would be “eSET Rescue Disk”. This is just to make it easier to identify, in case you forget what it is meant for and connect it to another PC to transfer files.
Under Format Options, enter a ‘volume label’. In this case, it would be “eSET Rescue Disk”. This is just to make it easier to identify, in case you forget what it is meant for and connect it to another PC to transfer files.
6.
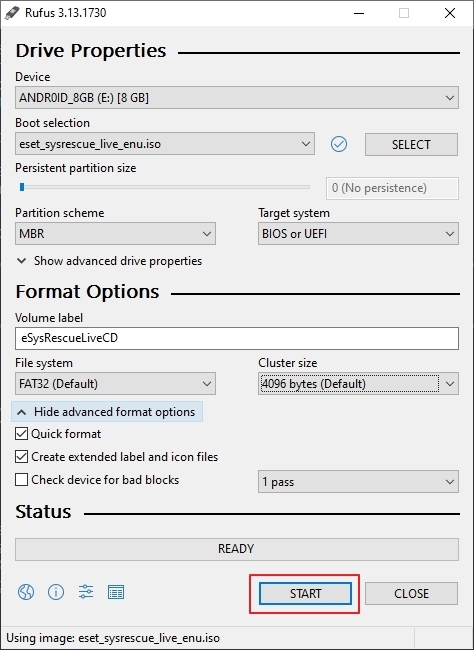
Click the Start button to turn the flash drive into a bootable USB drive. Once the process completes, close Rufus and safely eject the flash drive.
Click the Start button to turn the flash drive into a bootable USB drive. Once the process completes, close Rufus and safely eject the flash drive.
Now all you need to do is configure the boot order in the BIOS before you can boot off the pen drive.
Note: Keep your bootable USB drives in a safe place. It’s part of your Windows first-aid kit.
Source link


